Well guys after a long break i have decided to continue my blog!
Each section is followed by a three-letter keyword enclosed in square brackets. Enter this keyword into a text-locator feature (Ctrl+F on most text viewers) and you'll be directed straight to the keyworded section. - Copyright / disclaimer [cpy] - About this guide [abt] - The weapons [wns] - Crowbar [CRW] - Glock 9mm [GLK] - .357 Colt [357] - MP-5 Assault Rifle [MP5] - Shotgun [SGN] - Crossbow [XBW] - Rocket launcher [RPG] - Tau Cannon [TAU] - Gluon Gun [GLU] - Hivehand [HNT] - Hand grenades [HGD]- Satchel Charges [STL]- Snarks [SNK] - Tripmines [MIN] - Single player weapon [loc] locations - Underwater [uwf] functionality - Frequently Asked [FAQ] Questions - Contacting me [cme] - Version history [ver] - Credits [cts] ------------------------ About this [abt] guide ------------------------ Why a Half-Life guide in 2012? Well, it remains a popular multiplayer game, and regardless of its age still stands as one of the best First Person Shooters out there, surpassing even current releases in terms of level design, scripted sequence, and, of course, armory. Half-life deserves to be played to death even ten years after its release, and besides which, the whole HL/Opposing Force/Blue Shift package now comes in one cheap bundle thanks to STEAM. ------------------------ The weapons [wns] ------------------------
In order to engage enemies and opponents throughout the game, weapons are
truly the only way of interacting with your targets. Whether they are ranged, close-combat, or explosive, each has a certain disadvantage or flaw. It's best to understand the flaws and efficient capabilities of each item before rushing out into battle. My Ratings from the very experience i had !.._____.. |CROWBAR|"This is your typical crowbar used for prying objects open, and breaching doorways. Thankfully, its heavy weight, and ability to be swung from the hand makes it the perfect weapon in close quarters. However, don't rely on an overwhelming blow to the victim. Use this as a last resort with no ammo for other weapons."POWER: * ACCURACY: ** RANGE: * OVERALL: * -------------------------------------------------------------------------- ..__________.. |GLOCK PISTOL|"This is your traditional pistol firearm for most security guards and law enforcement officers across the country. Equipped with a 17-clip magazine, the GLOCK can lay down accurate shots on targets even from a hefty distance. Its secondary fire sends out a rapid barrage of bullets at a quicker firing rate. However, this packs hardly any wallop against bigger opponents."POWER: ** ACCURACY: *** RANGE: **** OVERALL: ** -------------------------------------------------------------------------- .._________.. |.357 MAGNUM|"This is not your typical pistol. This baby is a powerful revolver coated with a chrome outlaying to give it a Dirty Harry look. With 6-enhanced bullets, the Magnum can penetrate even some of the most sturdy walls during the game. While its rate of fire is slow, and its ammo capacity is small, the power and accuracy is enough to be satisfied with." POWER: **** ACCURACY: *** RANGE: *** OVERALL: *** -------------------------------------------------------------------------- .._____.. |SHOTGUN|"This is a specialized shotgun designed primarily for assaults. With thecapacity of up to eight shells, and a secondary feature that fires two shells at once, the shotgun is a very favorable close combat weapon. However, each shot requires a pumping on the manifold in order to fire another bullet. This can be a drawback during an intense battle." POWER: **** ACCURACY: ** RANGE: * OVERALL: *** -------------------------------------------------------------------------- .._____.. |MP5 SMG|"The MP5 Submachine Gun is basically an automatic gun with lighter ammocapacity. Unlike today's rifles which pack a wallop and have quite some recoil, SMGs are a tad easier to control, and provide a fast rate of fire. The 50-bullet clip is plenty to expend upon opponents during a firefight. This gun also has a special secondary feature of launching grenades out when gathered. These can be destructive to lighter opponents, and proves to be a deadly combo." POWER: *** ACCURACY: ** RANGE: *** OVERALL: **** -------------------------------------------------------------------------- .._____.. |GRENADE|"Grenades are small circular objects that provide explosive damage when a pin is pulled, and the object is tossed towards the target. The grenades featured during the game have a 3-second det from release, and can be tossed farther by holding them down and jumping while releasing. However, grenades can be awry at certain times, especially when they bounce back, or are held on too long." POWER: **** ACCURACY: ** RANGE: **** OVERALL: *** -------------------------------------------------------------------------- ..____________.. |SATCHEL CHARGE|"Satchel charges up the ante on the gambling table. These are basically high-detonation explosives that can be tossed as little pouches on the ground. From there, you can then move away, and detonate them anytime you want with either a detonator, or by shooting them. The explosive damage is designed for leveling buildings, so make sure you get some distance between them and yourself. The only downfall is that they cannot be tossed very far." POWER: ***** ACCURACY: *** RANGE: * OVERALL: *** -------------------------------------------------------------------------- .._______.. |TRIP MINE|
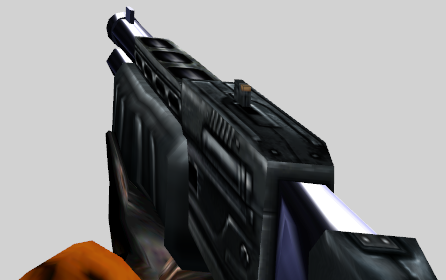
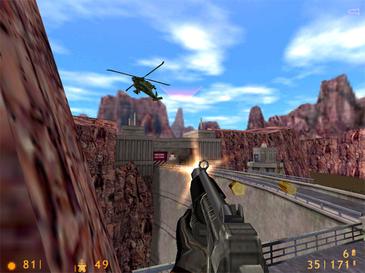
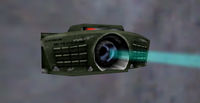
"This is yet another groovy device that you will encounter during the game,but rarely get a chance to use effectively. Trip mines are basically what they sound like. You can mount these on any rock solid surface, and a laser is then emitted from the starting point. If any object crosses this laser, or the mine is shot at, it will explode for quite some damage." POWER: **** ACCURACY: **** RANGE: * OVERALL: ** -------------------------------------------------------------------------- ..__________.. |RPG LAUNCHER|"This is not your typical weapon to encounter on the battlefield. The RPGis a rocket propelled grenade, or basically a rocket launcher. You can launch missiles out, one at a time, or guide your missiles with a laser dot by moving the dot at the specific target. The RPG is very useful in inflicting large amounts of damage to tanks, infantry, and even aircraft. The only disadvantage is a reload between each shot, and the kickback from firing the rocket." POWER: ***** ACCURACY: **** RANGE: **** OVERALL: ***** -------------------------------------------------------------------------- ..______.. |CROSSBOW|"At a first glance, you would believe that this item would totally suck.However, the crossbow is basically the sniper's weapon of choice. This item launches bolts out that soar slightly slower than a normal weapon, but inflict high amounts of damage. You can take out some of the biggest aliens with a few shots from this. The only problem is that it has a small 5-bolt clip, and the time it takes for an arrow to hit a target." POWER: **** ACCURACY: **** RANGE: ***** OVERALL: **** -------------------------------------------------------------------------- ..__________.. |GAUSS CANNON|"My personal choice an experimental weapon developed in the Black Mesa Labs, the Gauss Cannonuses a highly combustible energy, that is launched out in a piercing pattern. The result is a high-density laser that shoots through walls, obliterates organic targets, and literally kicks butt. The only problem is that if it's charged too long in secondary mode, an overcharge will hurt the user. Normal fire sends out rapid fire beams. It uses a special type of ammo that is fairly rare, so don't expect to use it too often." POWER: **** ACCURACY: **** RANGE: **** OVERALL: **** -------------------------------------------------------------------------- .._______.. |GLUON GUN|"This is probably the best weapon in the entire game. The Gluon Gun is yetanother extremely rare weapon acquired near the end that acts like the Gauss Cannon, but has an unknown effect. It's believed that the item disrupts the genetic code in opponents causing them to vanish into thin air. It is by far the most powerful weapon, and sends out a blue beam of swirling energy in a straight pattern. As usual, this uses the same rare ammo as the Gauss Cannon, so use it sparingly." POWER: ***** ACCURACY: **** RANGE: *** OVERALL: ***** ------------------------------------------------------------------------- .._______.. |HIVE-HAND|"This is the first Xen technology you will come across during the game. This item launches out mini-Xen bees which zoom in on the closest organic target and take away minimal damage. However, the catch is that you will alwayshave 8 bees to launch, and the ammo regenerates itself even when depleted at a rapid pace. So, you'll always have infinite ammo with this weapon. The secondary fire mode sends the bees out in a straight ahead pattern at a much quicker rate, which yields more damage." POWER: ** ACCURACY: ***** RANGE: *** OVERALL: *** -------------------------------------------------------------------------- ..___.. |SNARK|"These pesky little buggers are actually weapons that can be fairly lethal. Snarks are little Xen bugs that zoom in on the closest non-Xen target. These can be lethal when tossed in tight quarters because your opponent must shoot them in order to destroy them. They're very small, fast, and agile, so be quick with the trigger finger when tossing them. They CAN chase you if there are no targets in the vicinity."POWER: *** ACCURACY: * RANGE: **** OVERALL: ** -------------------------------------------------------------------------- -<>--<>--<>--<>--<>--<>--<>--<>--<>--<>--<>--<>--<>--<>--<>--<>--<>-================================================================================================================================================================== ------------------------ Crowbar [CRW] ------------------------ Primary fire: Swings the crowbar. Hold down fire to quickly thrash it about. Secondary fire: -- Ammo: n/a The very first weapon you come across, but not one to be forgotten. Whilst useless in any sort of ranged combat, the crowbar is excellent for dispatching a few very specific enemies and, more importantly, smashes crates and the like without using any valuable ammunition. Though not especially powerful, Gordon can swing the crowbar with surprising speed. Specific enemies: Used properly, the crowbar is an excellent means of dispatching weak, agile enemies that rely on close range attacks - especially when they can only approach from one direction. Headcrab infested air ducts, or, worse, snark infested tunnels, are made somewhat easier to deal with by the crowbar. I also tend to use this weapon when dealing with the baby headcrabs on xen, so hard to hit with any gun through their sheer speed. Some also swear by using it as an ammo-less alternative for dealing with barnacles: swing the crowbar when close to the creatures mouth, but before its bite connects, and you should destroy it. Keep in mind that this means you'll take falling damage if the barnacles is especially high, though. Never use it... Any other time - enemies with ranged attacks, or enemies that fight toe-to-toe yet can sustain several blows from a crowbar will easily dispatch you. Zombies can be bludgeoned to death, certainly, but the tactic is to secure a short volley of hits to the creature's head before quickly backpedaling - or else its powerful claws will connect. Multiplayer: It's quite common in multiplayer games to see players sneaking up on enemies (especially stationary opponents) before mincing them with a volley of crowbar hits. Certainly, the crowbar does a great deal of damage in a short space of time, and anyone successful in closing in on their opponent will often come out the victor whilst using the bar. But ultimately this remains more a tactic of humiliation than a sensible means of play - there are better ways of dealing similar or greater damage from range, and to attempt a melee attack in any other circumstance is suicide. ------------------------ 9mm glock [GLK] ------------------------ Primary fire: Semi-automatic fire with significant accuracy and good range. Hold down fire for a volley of shots. Deals 8 damage per hit. Secondary fire: Quicker (though by no means 'rapid') fire at the cost of accuracy. Ammo: Both modes use the same 17-round clips that are scattered freely through the facility and the hands of dead security guards. Reloading is quick. Be aware also that this weapon shares ammunition with the assault rifle. The glock is one of the very first weapons you'll handle, and though you quickly acquire more powerful means of dispatching enemies, don't forget about the trusty 9mm. Besides being one of the few weapons that can fire underwater, the pistol is reasonably quick and, more importantly, accurate. In long-range situations where cover is easily available, consider choosing the pistol to conserve ammunition. Specific enemies: As well as being handy for picking off stationary barnacles, in a pinch it's also useful against the flying alien controllers that appear towards the close of the game when at *especially* long distances- hard to hit, mobile but weak, the pistol can prove more effective against them than slower and more powerful long-range weapons with more expensive munitions (such as the revolver or crossbow). Use it to detonate tripmines from a distance, and to deal with houndeyes and zombies at medium range. Never use it...: In all other situations, however, the pistol simply doesn't have the stopping power to deal with enemies before they manage to injure you. Enemies whose attacks are hard to evade (human grunts) or situations where cover is scarce demand weapons with sheer stopping power - the pistol is absolutely not the tool for this job. If an alien controller is close by, I wouldn't even think of using the glock. Multiplayer: The pistol is often the default spawn weapon. If you're confident and a good aim, a succession of headshots at long range can stand as a reasonable offense, if there are no other alternatives. As a rule, however, you should equip yourself with whatever else is around before entering the foray. ------------------------ Colt .357 [357] ------------------------ Primary fire: Semi-automatic fire of a single round that delivers 40 damage. Exceptionally accurate. Secondary fire: In multiplayer, secondary fire activates a small scope that provides a zoomed view for fine aiming. Ammo: The gun can be loaded with up to 6 rounds, out of a maximum stock of 36. Ammunition is relatively scarce. This hand-cannon is difficult to dislike - aesthetically as much as tactically. A chunky, masculine weapon with an excellent feel, but also an extremely powerful firearm that, with careful aim, can take down practically anything. Remember that a headshot triples weapon damage - that means that a .357 round through some poor soul's skull deals a massive 120 damage - more than a direct explosive hit. Only the bosses, the dreaded ichthyosaur and the bullet-immune opponents can survive that, even on Hard mode. Of course, the .357 does have its own drawbacks - a low firing rate and reasonable reload time counter its massive power, but, ultimately this remains my favourite piece of half-life weaponry. Unlike the crossbow, whose arrows take time to reach their target, the .357 simply involves pointing the gun at something you want dead, and then firing. Specific enemies: The Colt is well suited to tackling alien grunts and human marines. Unless it is particularly agile and difficult to hit, most things are a great deal less threatening with a .357 by your side. Never use it... On common or weak enemies, such as headcrabs or houndeyes. Evasive enemies such as snarks should never be approached with the Colt: not only are they exceptionally weak, but the low firing rate and considerable reload time put a player at serious risk if they don't secure hits. But most importantly of all, .357 ammo is too scarce to use on frail creatures. Multiplayer: The Colt requires considerable accuracy to be effective - as mentioned above and in the shotgun overview, weapons with long reload times and slow firing rates leave their users vulnerable should their accuracy be poor, (and also, should their ping be high). Without a decent connection the slight lag makes aiming considerably more difficult. Otherwise, though, the Colt is a great way to conduct combat at long range, and a good choice in most open-area fights. ------------------------ MP-5 Submachinegun [MP5] ------------------------ Primary fire: Automatic fire of 9mm rounds that deal 5 damage per bullet. Fair accuracy. Secondary fire: Fires grenades that detonate on impact, in an arc. Each grenadedeals potentially 100 damage with a direct hit, with splash damage. Ammo: The MP-5 uses 50 round magazines, commonly found in the hands of deceasedhuman grunts, with a maximum stock of 250 bullets. Secondary fire employs up to ten grenades specific to the weapon (*not* hand grenades) and not commonly available. A nice piece of equipment that you'll turn to throughout the course of the game, the MP-5 is well suited to a variety of situations and enemies. Though individual rounds do little damage, and at long range the weapon is a little inaccurate, a steady stream of well-aimed bullets can eliminate many creatures, both human and alien, especially when the chest and head areas are targeted. Secondary fire is handy for terminating groups of enemies, grunts behind cover, and clearing out rooms, but also on occasions that demand explosive damage to particularly strong individuals. However, be aware that the MP5 grenades, though not rare, should never be fired without good purpose. Specific enemies: Use against soldiers, both human and xenian, and a spread of fully automatic fire can help eliminate snarks and baby heacrabs. Primary ammunition is abundant, and as such this weapon makes a nice 'default' weapon for dealing with the majority of Black Mesa's occupants. Never use it... There are few situation where using the MP-5 would be an especially bad idea, though there are plenty of circumstances where other weapons would be more appropriate. At close ranges, you may find that the assault rifle doesn't pack the punch necessary to take something down particularly quickly. At long ranges it isn't as accurate as some of its rivals - use the crossbow, Colt, or possibly Glock for high precision at these distances. Multiplayer: This will serve you well in most situations - try to predict an opponent's movements when launching grenades, and remember to focus your fire on an enemy rather than randomly spraying fire. Bullets are a little weak, so should an enemy close in on you you may fare better with the shotgun. This weapon is also great for covering yourself when fleeing - firing back whilst backpedaling is a great way to make your retreat safer. ------------------------ Shotgun [SGN] ------------------------ Primary fire: Fires a single shell. There is a noticeable delay before another shot can be fired. Secondary fire: Fires two shells in rapid succession. The firing delay is increased somewhat. Ammo: Up to 8 rounds can be loaded into the weapon, with a maximum of 125 rounds in stock. Reloading is slow, but can be interrupted simply by firing - handy to know in an emergency. Common fare in first person shooters, the half-life shotgun does not radically diverge from its predecessors in Doom and the like. As you would expect, the weapon is more accurate and powerful at close ranges, and possesses a low firing rate. Rounds pack a considerable punch, as each shell contains six pieces of shot, dealing 8 damage each, meaning a maximum of 48 damage, or 96 in secondary fire mode. A headshot at mid to short range will often prove fatal. However, as the distance between the user and target increases, the shotgun's effectiveness falls rapidly. Specific enemies: A blast to the chest will deal with zombies, and a shot to the head-neck-chest area will usually dispatch a human opponent. The shotgun is also well suited to dealing with bullsquids and vortiguants, so fire away. Never use it... Against particularly agile enemies (unless you have remarkable confidence in your accuracy), or at long range. You'll just be wasting your ammo. And with a long reload time, you'll be putting yourself in danger, too. Multiplayer: The shotgun has always been a popular choice in multiplayer - easy to use, strong, and familiar, you'll often see it equipped. Of course, it also helps that with good aim the shotgun is deadly. Remember, though, that reloading can be time-consuming, so be sure that cover is available when the weapon is empty, and that you don't miss too often, else you'll be put at serious disadvantage. ------------------------ Crossbow [XBW] ------------------------ Primary fire: Fire a bolt, delivering 50 damage. Projectiles take a little time to reach their destination. Bolts are explosive in multiplayer. Secondary fire: Use the scope. In zoomed mode, the weapon no longer fires explosive bolts. Ammo: The closest Half-Life has to a sniper rifle, the crossbow is well built for stealthily taking out enemies, not least stationary ones, from afar. A quiet weapon, but one whose projectiles make their own distinct noise, this equipment is possibly far better suited to keeping your position unknown than hiding its own presence. It's powerful, too, with a potential 150 damage should you pull off a headshot successfully. No wonder it's a multiplayer favourite. Bolts take a little time to reach their targets - to aim effectively, you must aim in front of his or her position as they run, and try to predict their movement. If they run in anything other than a straight line, however, prediction becomes a great deal more difficult. Reloading, and the pause between firing loaded bolts, is rather slow - be sure to have some sort of protection to fall upon between shots. In multiplayer mode, bolts fired in primary mode are explosive, though sport a disappointing splash damage range. Please see the FAQ below for an extended discussion on the inferiority of the bow to the Colt for sniping purposes. Specific enemies: I choose the bow for dealing with stronger opponents, such as grunts (either human or alien) at long ranges. The crossbow is great for dealing with human enemies in stationary positions without revealing your own location. This is *the* weapon for dealing with ichthyosaurs. Never use it... Bolts need to be saved for sturdier opponents, and those easier to hit, due to the weapon's lack of speed and the finite speed of the projectile. Some enemies can quickly close in if not dispatched quickly, such as a charging bullsquid or alerted soldiers, so the potential exposure of the weapon's long reloading time makes it a poor choice for these circumstances. ------------------------ Rocket Launcher [RPG] ------------------------ Primary fire: Launches a rocket propelled grenade towards a laser 'painted' position, that moves in a straight line if no laser 'painted' target is available. A direct hit from a rocket delivers 100 damage, with a considerable splash-damage radius. Secondary fire: Turns on or off the RPG's own laser guidance system, illuminating a position and marking it as a target. Ammo: The weapon holds one rocket, with a maximum of five ammo in reserve (more in multiplayer). Ammo is rare. What FPS wouldn't have a rocket launcher of some description? Half-life follows the tradition, but also breaks the mould with this adaptation of the shooter classic. Missiles can be laser guided using a red 'pointer' projected out of the weapon itself, or 'blind-fired' in a straight line if the guidance system is switched off. This means that you can steer rockets to connect with moving targets, or twist them around obstacles or even, with a deft flick of the mouse, sharp turns. This takes a lot of practice, so I'd recommend trying it out in a map like killbox, or hosting your own empty server to get the hang of it. Be aware that rockets can't recognize their parent weapon's laser points (i.e. they can't tell one laser painter from another), and it is possible to actually commandeer an opponent's missile. This takes possibly more luck than skill, but seems to depend on placing your own pointer such that it is as close to the center of the missile's 'vision' as possible, if that makes sense. However, I've only very rarely been able to pull it off, and can't yet confirm a method for reliably doing this. Turning the laser off can be helpful at times - you can't turn and flee whilst aiming a missile, and this often leaves you exposed to enemy fire. Bear this in mind. Oh, and another thing: reloading is slow. Be sure to have some available between shots. Specific enemies: This is the ideal weapon for taking out Apache helicopters and tanks, which is presumably why RPG ammo is often found conveniently close to such vehicles. On occasion you might fire this against a large group of alien grunts, but otherwise, save it for special occasions and particularly meaty enemies. Be aware also that most Gargantuas are to be killed by some exploit of the level (the air strikes in Surface Tension) rather than by explosive fire. Never use it... Unless dealing with a slow or flying enemy, always aim at the floor under your opponent's feet or a wall running by him. Don't fire directly at him (or her). That way, should you miss, you'll still deal major splash damage, rather than seeing it sail away harmlessly (exposing you during the RPG's long reloading period). Don't waste this on weak or nimble flying enemies (e.g. alien controllers), nor on enemies that can be dispatched with weapons dependent on more common ammunition. I shouldn't need to mention this, but at close quarters a rocket can deal considerable splash damage to *you*. Multiplayer: The RPG is a common weapon in deathmatch, thanks to sheer power and relative ease of use. Fragging with splash damage is often reasonably easy, especially from an elevated position. That said, reloading is time consuming and the rockets leave a stark white trail of smoke in their path, pointing towards the position from where the shell was fired - so after the rocket connects, beat feet, and quickly. The laser 'painter' is visible from quite a distance, so you may prefer to keep it switched off before taking aim in order to keep your presence unknown. I would really recommend reading SBolle's guide on Half-Life multiplayer for both weapon tips and advice on how to use the RPG effectively. ------------------------ Tau Cannon [TAU] ------------------------ Primary fire: Rapidly shoots a series of particle beams that inflict 20 damage per hit. Uses 2 ammo per shot. Secondary fire: Hold down secondary fire to charge up the weapon, and then release the button to discharge all stored energy in a single high power beam yhat penetrates certain surfaces to create a deadly explosion of high-energy leptons at the exit point. In single player, over-charging results in an explosion that damages the user: once fully charged, the player only has a few seconds available to discharge the gun without a potentially fatal overheat. On occasion the secondary beam does not penetrate a surface, but bounces off it. Nevertheless, this can still be exploited to create a deadly ricochet effect. Ammo: Holds up to 100 depleted uranium pellets, shared with the gluon gun. This weapon does not use magazines, rather the entire munition stock feeds directly into the weapon. Black Mesa's role as a military research center produced this, a prototype for the assault rifle of the future. Firing exotic subatomic particles, the Tau cannon (sometimes called the 'Gauss gun') looks as odd and unfamiliar as its high-tech mechanism, and works rather differently to most conventional weapons you'll have played with before too. Primary fire is inaccurate, but can eliminate enemies quickly. Secondary fire, however, provides the most interesting uses. A charged up tau cannon fires a single, accurate beam with power proportional to the amount of energy stored up in the weapon. This weapon passes through walls to generate an explosion of energy on the other side of the object, dealing significant damage to anything unfortunate enough to be within radius. In multiplayer comes another interesting feature of this weapon's charge mode. The overload explosion is gone, to be replaced with a different drawback, a particularly potent recoil. I say 'drawback', but in actuality this recoil can be exploited for the purposes of 'gauss jumping'. Point the weapon towards the floor at one's feet, and the recoil now shoots the player far into the air, further if timed with a jump. Though there's a real risk of taking damage on landing, with practice this is a great way to reach areas either difficult or even impossible to reach by conventional means. Specific enemies: Depleted uranium isn't too cheap, and primary fire is notoriously inaccurate, so save the tau cannon for charged shots at particularly formidable targets. Consider firing them at tanks and military vehicles, or the occasional alien grunt. Some people swear by the gauss gun for dispatching the flying alien controllers that appear in the later chapters of the game: if you've the accuracy, then do so, by all means. Otherwise keep the ammo for the gluon gun. Never use it... As mentioned, ammunition needs to be saved for worthy opponents, and primary fire is not recommended excepting circumstances where a large portion of beams will connect (closer distances, or very large targets). This weapon is better used against slower targets that are easier to hit: the tau's secondary fire demands accuracy. Multiplayer: A common choice in multiplayer, the gauss gun is recommended when latency / ping can be kept to a minimum. Picking people off at long range never tires, and the introduction of the tau brings something totally new to bear when your rivals attempt to take cover. Conversely, it can often be safer when tackling a tau user to stay in the open: it's a great deal easier to hit someone with the particle explosion than with the focused beam. ------------------------ Gluon gun [GLU] ------------------------ Primary fire: Fires the beam. Each unit of ammunition used deals 14 damage. The beam possesses excellent accuracy, and ignores armour. Secondary fire: n/a Ammo: Like the tau cannon, this weapon uses depleted uranium pellets fed directly from stock, rather than held in a magazine. Possibly the closest half-life has to an 'ultimate weapon', the gluon gun (AKA 'Egon gun')apparently disrupts the fundamental structure of matter, reducing targets to a messy mass of mincemeat. 14 damage per hit may not sound impressive, but the gluon gun fires its continuous vortex of energy at a frenzied rate, destroying most targets in moments. Of course, this also means that the gluon gun eats through valuable ammo at dramatic speed. This means that accuracy is key - never spray egon gun beams randomly, but rather pinpoint your fire. Specific enemies: Save the gluon gun for special occasions, where a large number of powerful enemies need to be dispatched quickly. Large groups of alien grunts might qualify, but I'd certainly recommend using this device during the indoor portions of 'Interloper', especially the final 'spiral staircase' room. You'll know it when you get there. Never use it: There's nothing, except the Gargantua and military vehicles, that stands up to the gluon gun. Just don't waste ammo on houndeyes or headcrabs. Multiplayer: Though not necessarily a match winner, the gluon gun nevertheless remains a lusted-after piece of equipment in most games. For that reason alone you'll often draw fire, though of course it doesn't help that most players will (rightly) regard you as a real threat. Still, with the gluon gun, it doesn't especially matter - with good aim, any opponent can be killed in a few moments, and as weapon accuracy remains constant regardless of range this is probably one of the best weapons for a variety of circumstances. The only precaution I give is to not eat through ammo without good reason. ------------------------ Hivehand [HNT] ------------------------ Primary fire: Launches an insect, in semi-automatic manner, that possesses the capacity to hone in on enemies. Each hornet deals 8 damage. Secondary fire: Rapidly fires the hornets without honing abilities. Ammo: The hivehand holds up to 8 bees, that regenerate whilst the weapon is not being used. This strange bio-mechanical device (also referred to as the 'hornetgun') is the principal weapon of the alien grunts, who seem to have hivehands actually grafted onto their arms. In a hornetgun standoff, unfortunately, it seems to work better at annoying you than at mounting an effective offense against *them*. Whilst the honing ability appears impressive, the rate of fire and actual power of this weapon is somewhat less so, and munitions don't regenerate nearly as quickly as you'd like. It is, however, one of the few firearms that works underwater, though by the time you have it there are few instances where you'll need to go swimming around. A neat trick I once heard involved using primary fire to determine if an enemy waited around a corner - the hornets would swerve to hit their target, and even if they did not connect, your opponent would lose the advantage of surprise. Specific enemies: the honing abilities make this a decent means of dealing with the evasive baby headcrabs and snarks. Otherwise, I would rarely use this weapon. Never use it... Unless you run out of ammunition, I just wouldn't otherwise use the hivehand. If you must choose it, be sure to have some sort of cover available to protect you whilst ammo regenerates. Multiplayer: Some high-ping players may find the hornetgun useful when their latency makes aiming difficult. Alternatively, it can be used to goad enemies out of cover, should they be hiding behind a wall or in a bunker. Otherwise, though, stick to more powerful pieces of equipment. ------------------------ Grenade [HGD] ------------------------ Primary fire: Throws a grenade - press fire to release the pin, and release fire to throw the device. Be aware that should the timer expire whilst the grenade is held, it will explode the moment Gordon releases it. The fuse lasts five seconds, and a direct hit deals 100 splash damage. Throwing distance is dependent on the angle of launching. Secondary fire: n/a Ammo: Up to ten grenades can be held, to be thrown individually. The stock of hand grenades is *not* shared with the supply of MP-5 grenades. Chances are that you'll already be familiar with the essential principle of a hand grenade - a timed explosive that can be thrown. As you would expect, grenades can bounce off walls, but in Half-Life tend not to roll once they have touched a floor. This means that, with a little practice, they can be used with surprising accuracy. A handy feature of the grenades is that they can be held in their armed state before throwing - meaning that a proficient user can time the detonation to occur the moment the grenade lands, or whilst still in the air, should he or she choose it. This tactic is often called 'cooking' a grenade. Be aware that many enemies, especially humans, can hear grenades on landing, and tend to flee. Specific enemies: Grenades are great for groups of reasonably powerful enemies, such as grunts or vortiguants, or even a particularly large cluster of weak creatures. Though humans tend to flee grenades, you can exploit this to flush soldiers out of cover . Chuck grenades into manned machinegun nests, or at automated turrets to silence them permanently. They are also useful for distracting the massive tentacle organism that inhabits the Blast Pit chapter. The fact that they travel in an arc, in essence, means that they can be thrown above cover - useful when dealing with the snipers in Surface Tension. Never use it: In enclosed spaces, there's a real risk of dealing damage to yourself, as there is with any explosive device. Grenades can only be thrown a shortish distance; they are not suitable for long-range exchanges of fire (as you would expect). Using this weapon is mostly common sense, really. Multiplayer: Hand grenades aren't especially a common sight in multiplayer games: difficult to aim, they also take time to detonate, and they don't have the range. The power and ease of use of other explosives typically freely available in online games make this a are choice. Still, with practice, they remain a means of dispatching a group of opponents if the user correctly times the explosion - but this is often reliant as much on luck as skill, so I would tend not to bother. They are, however, suited to clearing out snipers' nests / camping spots. ------------------------ Satchel Charge [STL] ------------------------ Primary fire: Drops an explosive charge if none are placed, detonates it and all others placed otherwise ('detonation mode' - Gordon will have the remote control in his hand). Satchels are slid across the floor a short distance. They are capable of dealing up to 150 damage, with splash effect. Secondary fire: If in 'detonation mode' (i.e. a charge has already been placed), secondary fire throws another satchel. Simple stuff, really. Ammo: You may carry up to 5 satchels, and throw one at once. They tend to be found in army munitions crates. A fairly simple concept, using a satchel involves no more than placing an explosive and detonating it at your will. Although it *can* be used offensively, much like a grenade (jump up and throw to have it arc through the air), it tends to be ineffective in such a capacity, and far better suited for trapping opponents. Such are the variety of ways these traps might be established that the only real limit on the possibilities is your own brain. Simple strategies involve chucking a stachel, poking around a corner to attract an enemy's attention, and detonating the charge as he follows. You can also detonate mines that are within the explosive's blast radius, too, though there's few things that stand up to direct damage to this weapon. Specific enemies: Anything prone to following you is bait. Human grunts, for all their intelligence, walk rather easily into satchel traps, and on occasion I've found it a nice way to dispatch the evasive but aggressive black ops assassins. Never use it: Obviously, ammo is too scarce to waste on headcrabs and houndeyes, but other than that you need to be aware that there are no alternate routes to your position if you intend to bait grunts or assassins. Oh, I suppose I should remind you that you need to stand well clear of the explosive, else severe injury might follow. Multiplayer: Satchels aren't especially common in deathmatch, considering the aggressive nature of play, and though they might be chucked about as grenades, it's rare that better alternatives are unavailable (e.g. RPGs, MP-5 grenades). Still, if you know that a specific opponent is coming, satchels are a nice way to score kills without putting yourself at risk. Some players also use them whilst fleeing, hoping that pursuers are sufficiently distracted by the promise of a kill to see the trap. On occasion I've seen them used in kamikaze tactics when a player is trapped at short quarters. I've also seen players place satchels on weapon pickups, hoping that they won't be noticed by greedy rivals, especially on satchel pickups themselves. Watch out for this. ------------------------ Snark [SNK] ------------------------ Primary fire: Throw a snark. Several snarks can be thrown. A snark bite deals 10 damage, a snark 'explosion' deals only 5. Secondary fire: n/a Ammo: Snark eggs (that often spawn snarks against you!) provide 5 with each pickup, up to a maximum capacity of 15. Snark, snark, snark, snark, snark. I love saying it. This is your 'pet', a particulalry aggressive alien creature that pursues non-xenian enemies and attacks them at close range, repeatedly. The snarks do not live long, however, and disappear in a burst of acid after a short time period. Their remaining lifespan is indicated by the squeaks they make: their cries increase pitch with time. Be aware that snarks will attack just about anything that doesn't come from xen - that means you, too, if the creature cannot find any viable alternative targets. They possess 2 health each, and explode upon death. Specific enemies: Snarks work well against human grunts, and can be used to locate assassins. Never use it... Obviously, when no terrestrial creatures other than yourself are available as targets. Be aware that snarks cannot jump over obstacles or long gaps. Multiplayer: The snark is an excellent choice for multiplayer - all opponents are viable snark targets, and a barrage of snarks invariably unleashes chaos. Most players will be distracted by these potentially deadly xenofauna, and often turn their attentions to either evasion or destruction. Though you won't often secure frags through snark usage alone, you will find it makes picking off panicking competitors all the more easy. Throw large groups of them to be effective, ideally from an elevated position (so they can't turn on you instead). ------------------------ Laser tripmine [MIN] ------------------------ Primary fire: Set a tripmine on the surface the player is looking at. A mine explosion can deal potentially 150 damage at close range, with splash damage. Secondary fire: n/a A useful tactical weapon, these mines emit a beam of light perpendicular to the surface the mine sits on. Should that beam be broken, or should the mine be damaged, it will instantly explode. There is a three second delay between setting a mine and its activation. The possibilities are endless, limited only by your imagination. Tripmines can be set up around corners to instantly kill approaching enemies - mines can be set up, enemies coaxed into pursuit, and almost certainly reduced to minced flesh. Tripmines can be placed on the floor to be shot at as a grunt passes by, or mines can be placed within proximity of each other's explosive range, to create a deadly chain of explosions. I'll leave you to imagine further applications. They can also, interestingly enough, be used as stepping stones. Place a mine on a wall, and it is possible to carefully jump onto the device itself. Theoretically a set of stairs can be created - there have been several shortcuts (especially useful in speedruns) that have exploited this 'feature'. Most players will never use it, but it's nice to know. Specific enemies: Anything that will chase you without being able to jump or duck is a possible candidate - especially something reasonably strong, as mines are not abundantly available. Grunts, both human and alien, are good choices. Though assassins can jump over them, it is nevertheless possible to place two mines, one above the other, in a passageway wall, to make it impassible. Ultimately, their application depends on your brain. Never use it... When pursuit is unlikely, or when several safe alternate routes are available to an enemy. Multiplayer: Multiplayer usage is not tremendously common, but does occur in certain maps, especially ones with tight enclosed spaces and plenty of narrow corners. It is possible to lay a mine on a wall, and hide a vertically facing mine within range of its blast radius, such that a player who destroys the first with a gun is killed by the second. Because multiplayer games are all about fast paced movement, many players move around with little attention to their environs, especially when fleeing more powerful opponents. You can exploit this, and the many choke points in several maps - placing them around the corners of narrow corridors, or at the top of ladders, is a common tactic. Placing them on spawn points is not looked upon kindly. Be aware also that you are exposed to attacks whilst placing a mine: I would recommend speed rather than precision when setting them down.


No comments:
Post a Comment